Stellar Knowledge Base

What are the Steps to assign full disk access for macOS Ventura (Version 13) and other later versions?

 Modified on: December 9, 2022 |    140 views

To allow Stellar Photo Recovery software to scan and recover your data, assign Full Disk access to your Mac device.

How to assign full disk access for Stellar Photo Recovery in macOS Ventura (Version 13)?

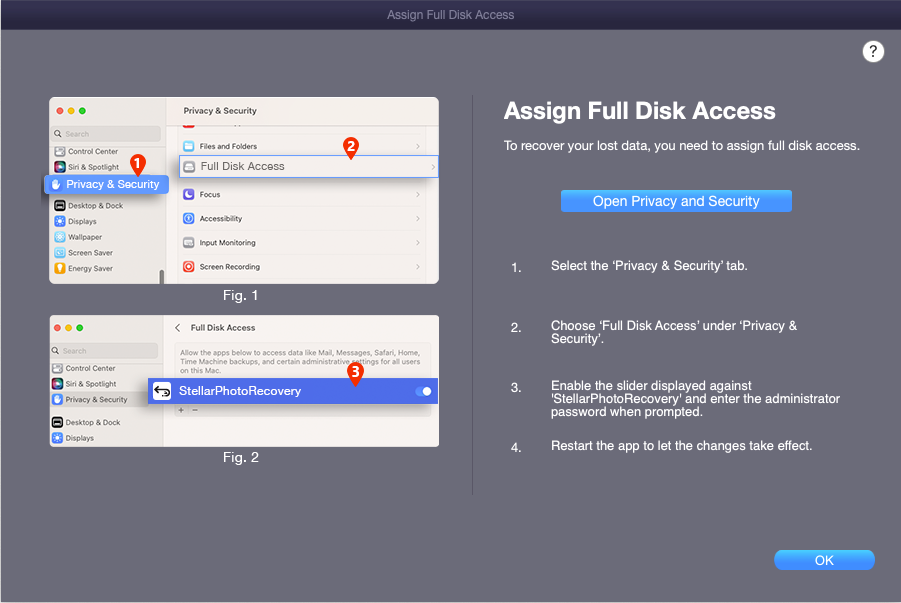
  1. Click the Open Privacy and Security button.
    Privacy and Security button macOS
  2. In the Privacy and Security window, scroll down and select Full Disk Access.
  3. Enable the slider displayed against 'StellarPhotoRecovery.'
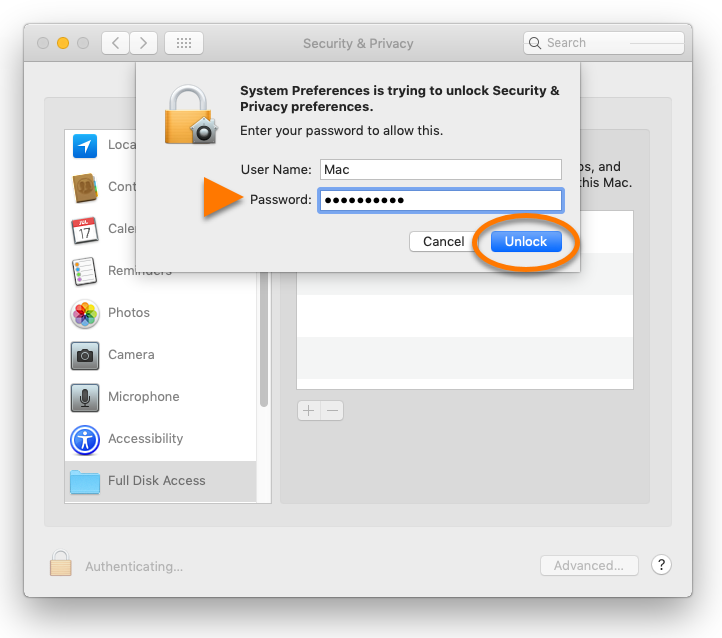
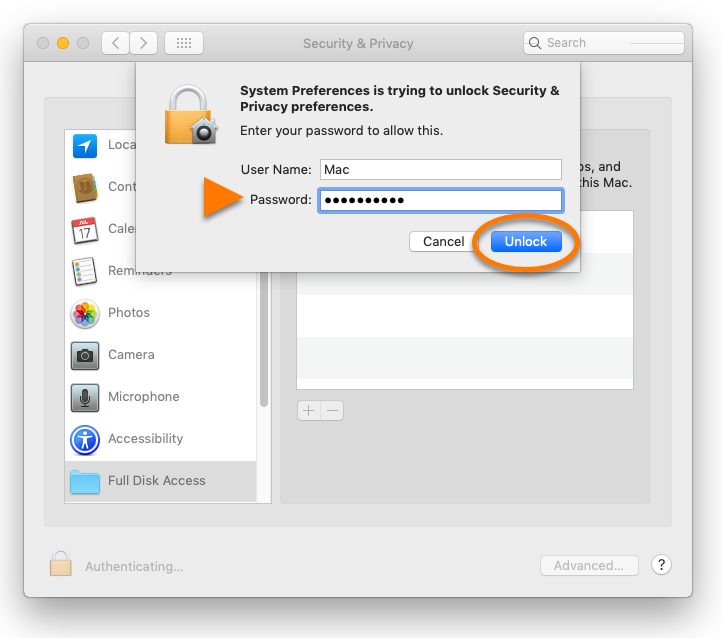
  4. Enter your Mac login credentials if prompted, and click Unlock to approve it.
    click Unlock
  5. Restart the app to let the changes take effect.

How to assign full disk access for Stellar Photo Recovery macOS versions 12.6 & 11.7?

  1. Click on Open Security and Privacy.
    Open Security and Privacy
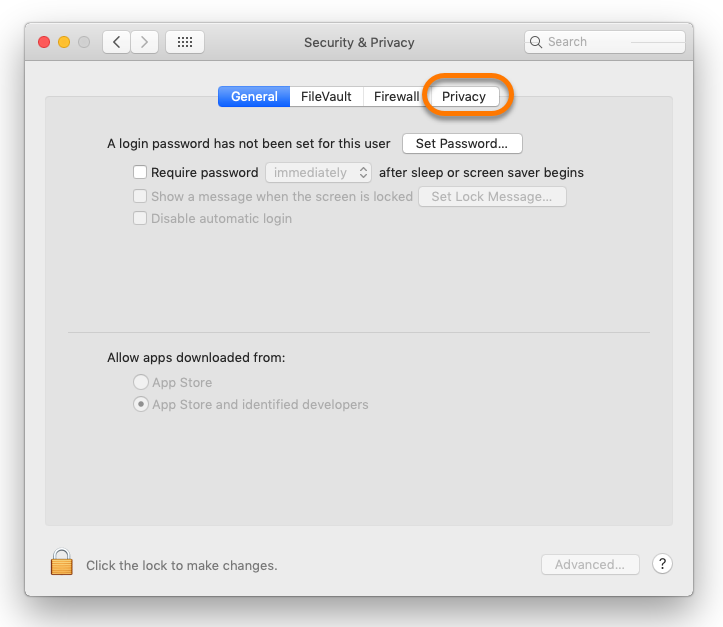
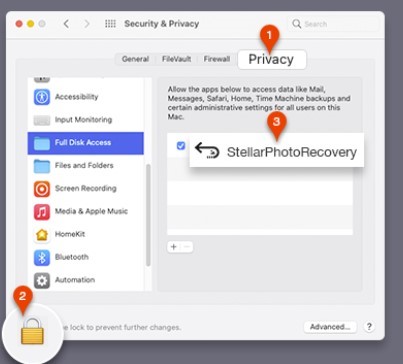
  2. In the Security & Privacy window, go to the Privacy tab.
    Privacy tab
  3. Click the lock Lock Icon icon, enter your administrator credentials, and click Unlock
    administrator credentials
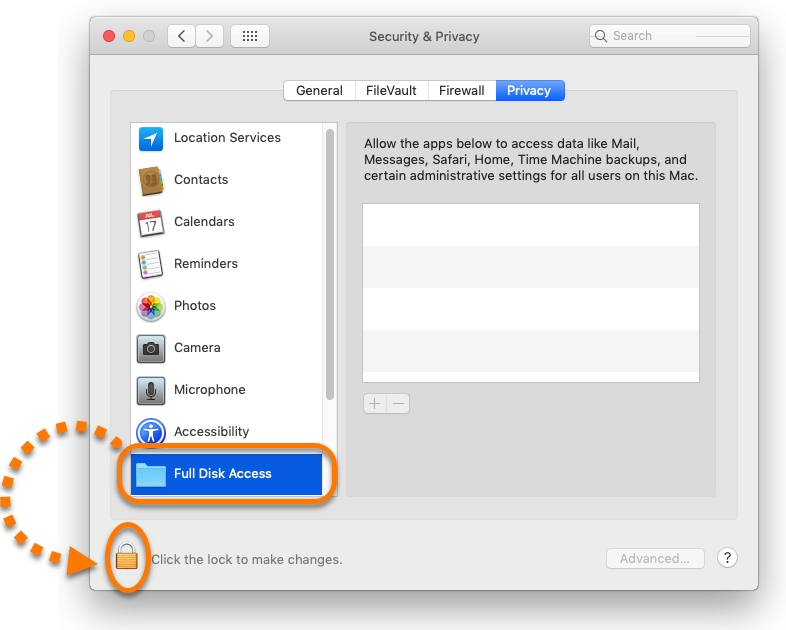
  4. From the left pane, select Full Disk Access and tick mark StellarPhotoRecovery.
    Full Disk Access- Stellar Photo Recovery
  5. Restart the app to let the changes take effect. 


User Comments

verfy04


Stellar Photo Recovery Stellar Photo Recovery is a Do-It-Yourself software to recover media files lost due to deletion, corruption or accidental formatting. It works with all major camera, drones, pc, memory cards, USB Flash Drives and more.

Learn More red arrow


Related Articles