-

Written By Santosh Kumar Gupta

-

Approved By Rohit Arora

Updated on May 10, 2022
-

Min Reading 7 Min
Summary: A cleaning spree of your Mac hard drive can get out of hand when you empty your Trash folder and end up deleting some critical files in the process. A couple of methods can help you perform Mac empty Trash recovery and reverse the permanent deletion. This article focuses on restoring empty Trash and performing advanced Mac Trash recovery using Stellar Data Recovery Free Edition for Mac and other easy methods. Download free trial here:

Table of Contents
- Introduction
- Trash Available on Mac
- Types of Deletion on Trash
- What after Emptying of Trash?
- Can I Recover Data from Emptied Trash on Mac?
- Deleted File Recovery after Emptying Trash on macOS
- When Isn’t Trash Recovery Feasible?
- Guaranteed Recovery Result Analysis
1. Introduction
“My MacBook Pro's SSD was running out of space, so I decided to clean my MacBook. I deleted all unnecessary items from my Startup disk and then emptied the Trash folder. In the process, I accidentally deleted a few old but important files. Is there a way I can recover deleted data from empty Trash?”
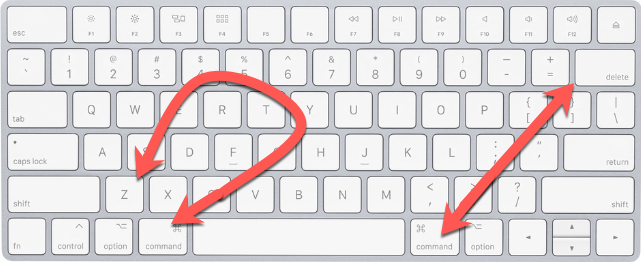
Emptying Trash without checking its content is a common mistake that many of you might commit ignorantly. You can reverse the Command + Delete operation through the Command + Z hotkey. But, when you Empty Trash and use Delete Immediately in the Trash folder, or press Option + Command + Delete hotkey, the operation cannot be reversed using the means provided in macOS
So, it would be best to employ some particular methods to salvage your Trash deleted files, which are shared underneath. The techniques apply to macOS Ventura, Monterey, Big Sur, Catalina, Mojave, and other lower versions. Before learning the recovery methods, knowing more about Trash will help in minimizing data loss.
2. Trash Available on Mac
You can find the Trash folder in the following places:
- The Dock present on the Mac Desktop contains the Trash icon that allows you to access the Trash folder.
- The Photos app has a Recently Deleted folder inside Albums that contains all app deleted photos.
- The Notes app also has a Recently Deleted folder that contains all your deleted notes.
- iCloud also has a Restore Files section that contains all your synced files that are deleted from your Mac.
3. Types of Deletion on Trash
Deletion can be of the following types:
- Bulk file deletion through "Empty Trash"
- Selective file deletion in Trash using “Delete Immediately”
- Auto deletion after 30 days
4. What after Emptying of Trash?
After emptying Trash, if you want to recover some files from it, then take the following measures:
- Stop using your Mac to avoid overwriting on the existing files
- Stop using your external drive if data is deleted from there
- Look for Time Machine backup of the files and folders that you accidentally deleted
5. Can I Recover Data from Emptied Trash on Mac?
Yes, when you empty Trash, the deleted data remains on the hard drive or SSD. The space occupied by it is marked as 'unallocated' or 'free.' The deleted files remain there until another data occupies that space. In the case of SSD, until the TRIM command overwrites the deleted files. You can recover this ‘unallocated’ or trashed data using free data recovery software for Mac. The following section describes different DIY methods to perform Mac empty trash recovery.
6. Deleted File Recovery after Emptying Trash on macOS
Data Recovery from empty trash on macOS can be performed using the following methods:
A. Using Time Machine Backup
Recover your emptied Trash data using Time Machine provided you’ve set up Time Machine backup drive and use it to back up your Mac. The steps to restore emptied trash files using Time Machine are as follows:
Step 1: Make sure the Time Machine backup drive is connected to your Mac.
Step 2: From the Menu bar, click the Time Machine icon and select Enter Time Machine.
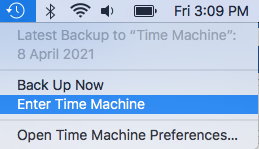
Note: If the Time Machine icon is missing, go to the Apple menu > System Preference > Time Machine. Then, select Show Time Machine in menu bar.
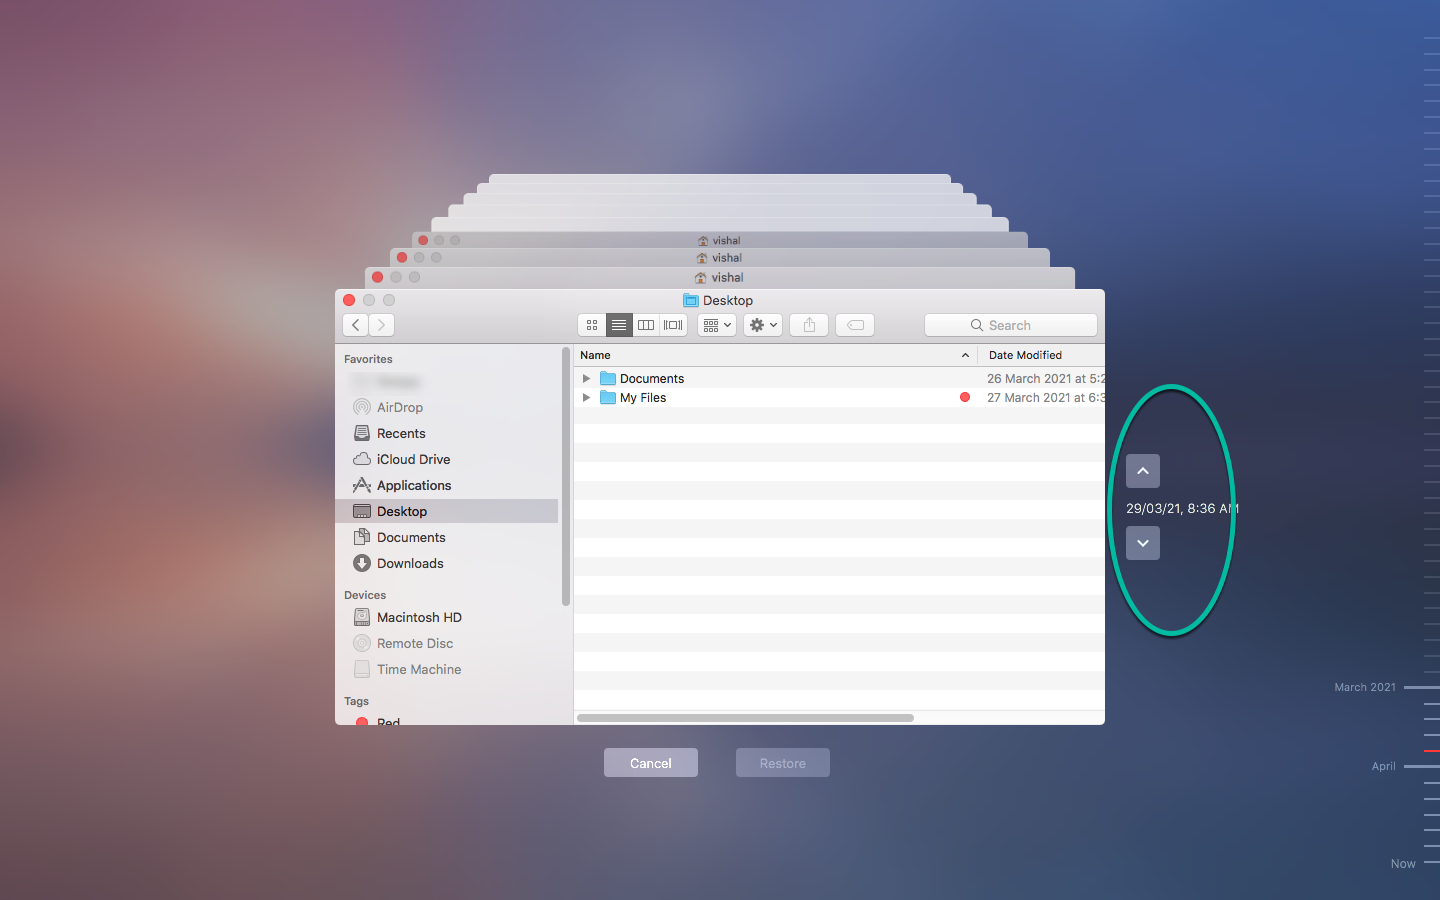
Step 3: Browse through the Time Machine using the Up/Down arrow button or the timeline.
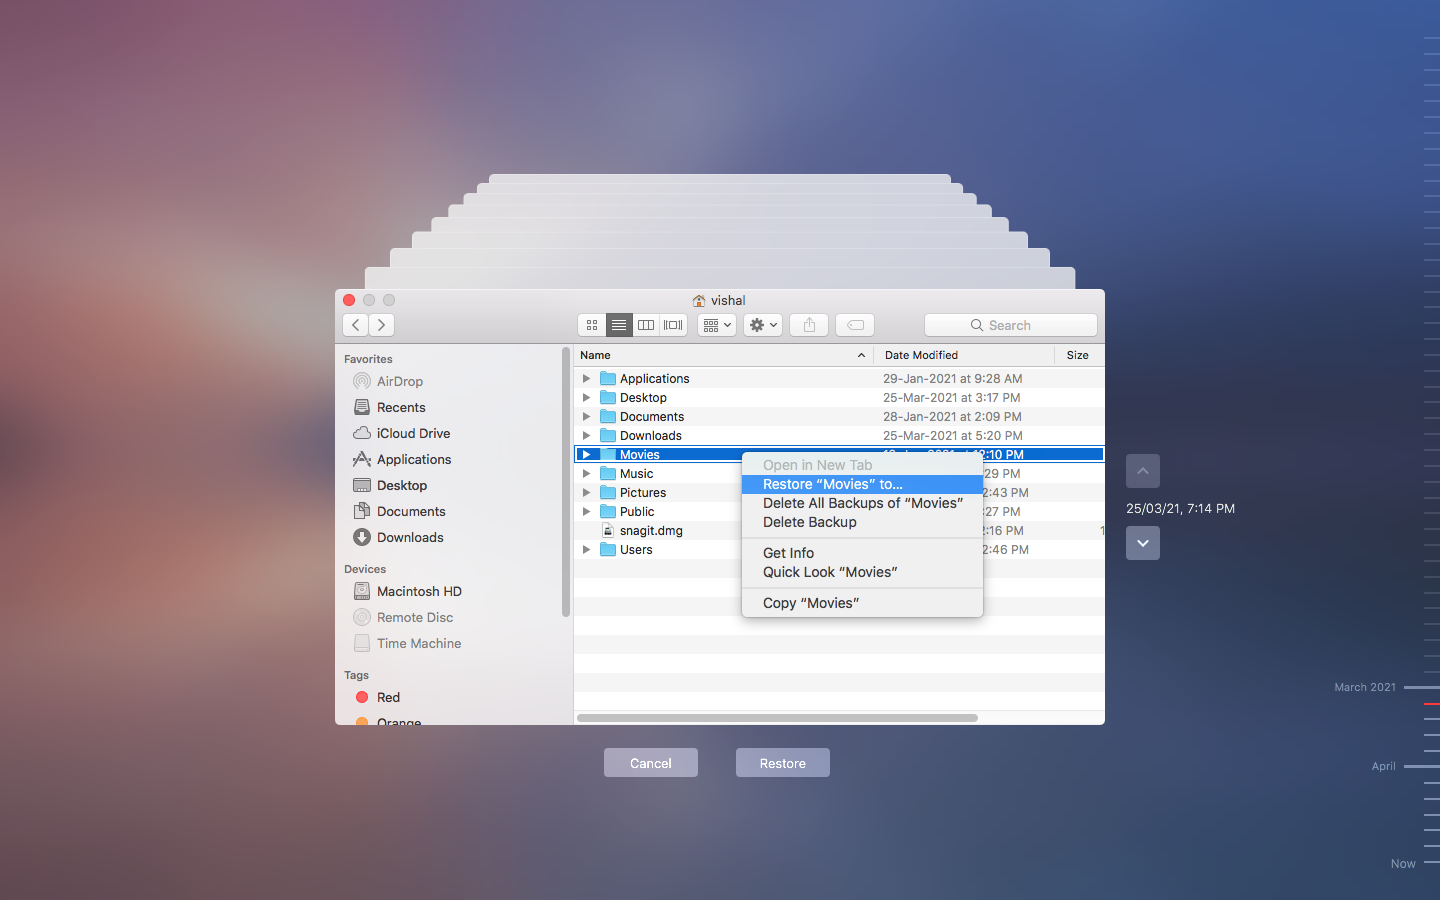
Step 4: Select the Trash deleted files and click Restore to place them to their original location.
B. Using File Recovery Software
Don’t panic if you don't have a Time Machine backup. Try a free file recovery tool for Mac to recover files from empty Trash. The steps to perform macOS empty Trash recovery are as follows:
Step 1: Install and launch *Stellar Data Recovery Free Edition software in your MacBook, Mac mini, or iMac.
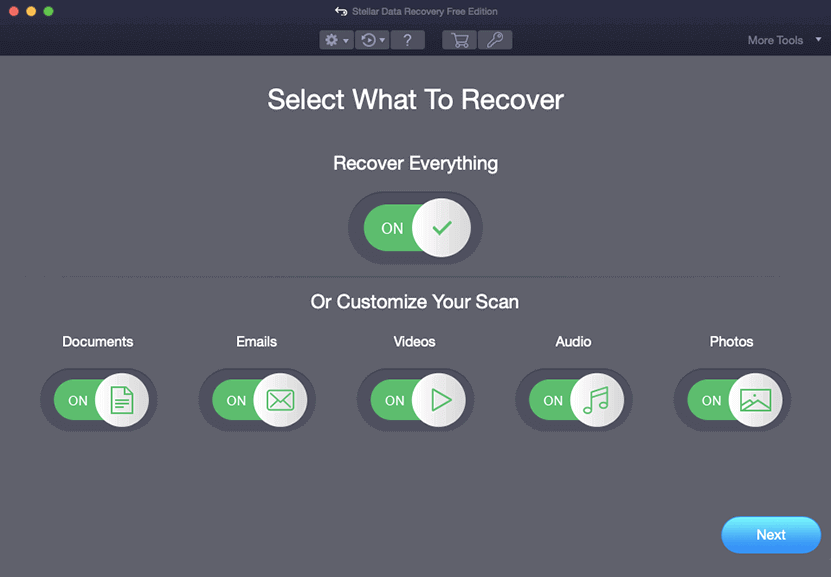
Step 2: From the “Select What To Recover” screen, select the type of files that you want to recover, then click Next.
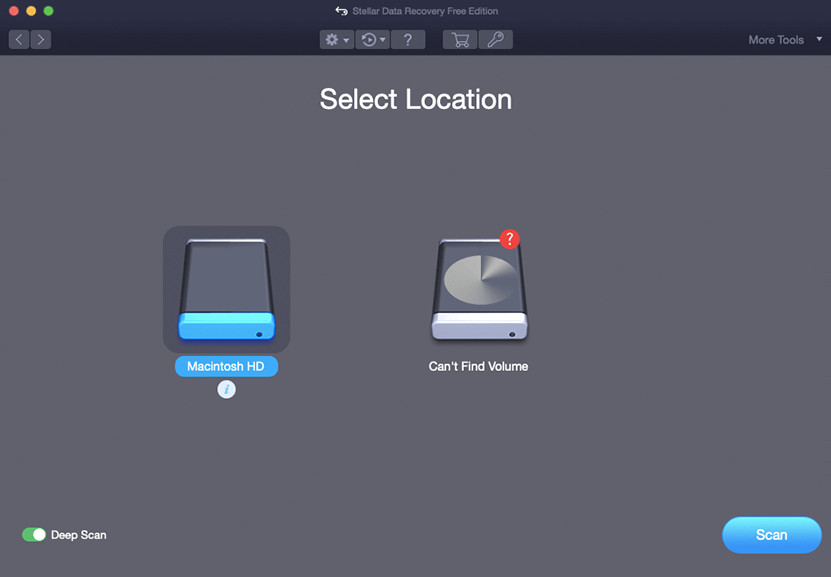
Step 3: From the “Select Location” screen, select Macintosh HD the Startup disk to perform empty Trash recovery.
In case you've deleted data from an external storage drive and emptied your Trash by keeping the drive connected, there is no need to select the startup disk (Macintosh HD) from the "Select Location" screen. Instead, connect the external drive and select the drive to perform Mac Trash recovery.
| Note: In macOS Ventura, Monterey, Big Sur, Catalina, Mojave, or High Sierra, you need to allow the Stellar Software’s extension to perform data recovery from the Startup disk. Learn more. |
Step 4: Toggle on the Deep Scan switch and click Scan to start the scanning process. This advanced scan mode scans your drive rigorously based on file signatures. It takes more time but shows a complete scan result.
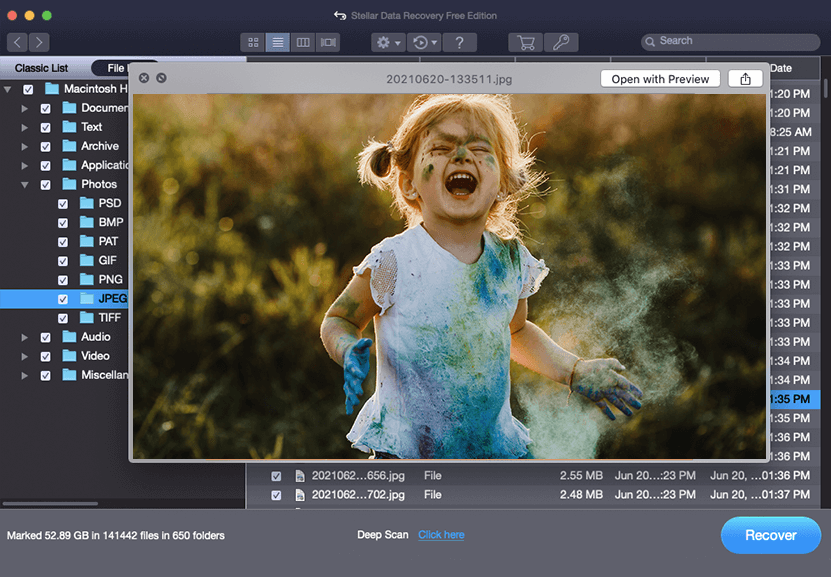
Step 5: After completing scanning, the software lists all the recoverable files and folders present in the drive in a tree view under Classic, File, and Deleted Lists. Select Deleted List, then navigate the folders.
| Tip: To avoid rescanning the drive, save the scan information using the Save Scan feature of the software. You can use the Load Scan feature to fetch the saved scan list anytime and recover data. |
Step 6: From the right pane, double-click a file to launch its preview. If you can’t preview some file types, don’t worry.
Step 7: Select the crucial files, then click Recover. Select a different volume or an external storage drive, then click Save to start saving the recoverable files.
*Stellar Data Recovery Free Edition for Mac lets you scan the drive, preview the recoverable files, and recover up to 1 GB of files without any cost. But to recover more, you need to upgrade the software to Professional or Premium edition. Don’t worry! All Stellar Software Products have a 30-day money-back guarantee; so, upgrade with complete confidence. |
Watch Stellar Data Recovery Professional for Mac software in action:
The software effectively recovers documents, videos, photos, emails, audio, and other deleted file types from internal or external storage drives. The software also helps recover data from formatted external drive, Time Machine backup drive, corrupt volume, and un-mountable USB drive. It also recovers all kinds of deleted files from Trash with their original name and date timestamp.
7. When Isn’t Trash Recovery Feasible?
Mac data recovery from Trash is not possible in the following situations:
- Overwritten files
- Trim enabled SSD
- Physically damaged device
8. Guaranteed Mac Trash Recovery Result Analysis
In case, you’re using:
- Time Machine – 100% data recovery is possible, provided the backup is latest
- Mac File Recovery Software – Up to 100% recovery of data after emptying Trash
Conclusion
Emptying Trash then realizing that you’ve deleted some critical files in the process is quite common. We recommend you back up your Mac using Time Machine and avoid any logical data loss scenario. In case your backup is obsolete, corrupt, or there’s no back up at all, choose a free Mac data recovery software, such as Stellar Data Recovery Free Edition for Mac. The software lets you recover all kinds of files emptied from Trash with their original name and date timestamps. Also, the software is compatible with macOS Ventura and earlier versions.


Related Articles
Common Causes of Data LossToday, data loss is almost like a natural di...
You'll need to enable the TRIM option if you want to get the most out...
Many people set up Mac Guest Accounts on their Macs so their family me...
Every Mac user has a lot of files stored on their Mac. Some files coul...
Mac machines are counted among the sturdiest systems available around...
Technology You Can Trust A Brand Present Across The Globe


